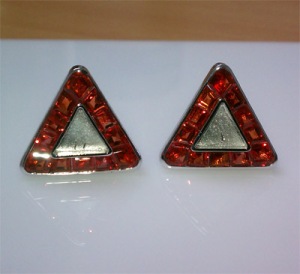
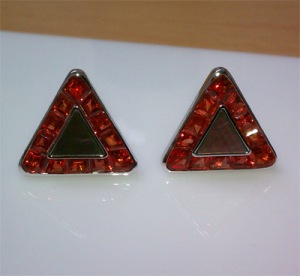
Orange shaped Triangle
January 3, 2013
‘Another year, another day’ is usually the saying that I go by to start off my first official work day back into the so called ‘daily grind’ of life. Nine out of ten times, I’d agree with that saying but this year seems like it’s going to be a different year. Unfortunately, 2012 didn’t really seem to end on a high with all the tragedies happening around us. It was heartbreaking just reading about all these horrible things that was happening in our society. But, we are human beings and we do tend to pick ourselves up when faced with adversity. The way 2012 ended for me as a whole was on a positive note. I was busy as hell during the Christmas rush period that the jewelry industry faces around the months of November and December. Yes, it isn’t what it used to be in terms of volume of work that used to show up on my doorsteps but, times have changed and would you look at that, I’m writing a blog to share my work and help people understand the labor side of my industry. Before I get into my first blog of 2013, my heart goes out to those who lost their lives and the family and friends that were affected with these horrible tragedies.
Now on to the business end of my blog. Orange shaped Triangle? I know my blog titles are sometimes tacky but they do tend to blend in with the subject that I’m writing about. So I get this job order to make some custom made cufflinks, in 14 karat, white gold. Simple right? Not really because the customer wants me to supply and cut orange sapphires, set in a channel setting with black mother of pearl cut into the bezel which sits in the middle of these cufflinks. It sounds so simple and standard but for some reason, jobs like this always ends up on my doorsteps. If anyone knows anything about how hard it is to find baguette shaped orange sapphires, they should know how difficult this job really is. There is no such thing as baguette shaped, orange sapphires because there isn’t a demand for it so none of my suppliers would have these stones, sitting around,collecting dust. My next option would be to find oval shapes sapphires large enough to cut down to the size I need. Seems simple, right? No, it isn’t simple. You need enough pieces, which in my case, 30 pieces that match in color and size. The size that I need are 6x4mm oval shapes which then, I need to cut down to some special cuts which involve tapered cuts and what not. Okay, so oval shaped, 6x4mm orange sapphires seems easy enough right? First of all, to find 30 pieces that match in color is going to be a difficult task. This requires me to find a few suppliers that carry orange sapphires.
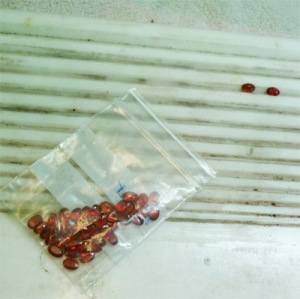
Fast forward the boring and annoying parts and I went through three suppliers and I found myself 32 matching 6x4mm oval shaped stones.
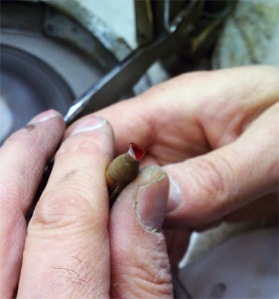
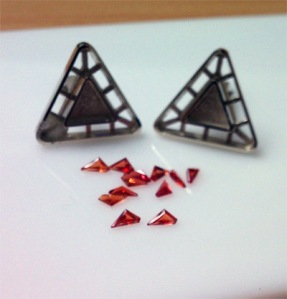
So here comes the fun part. Mapping out how I’m going to cut these sapphires. There are three corners in a triangle, obviously, but for those who didn’t know, you’re welcome and you can thank me later for your geometry lesson for today. I tried cutting a large diamond shape for each corner and it looked ugly so my next step was to cut that diamond shape that I originally thought would work, in half. So each corner would need 2 stones, sitting flush, next to each other, supported by the bezel walls.
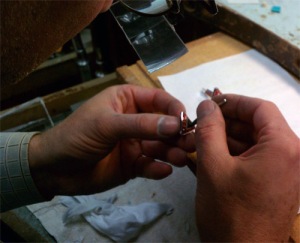
Here you got my pops cutting the sapphires to the sizes that I need.

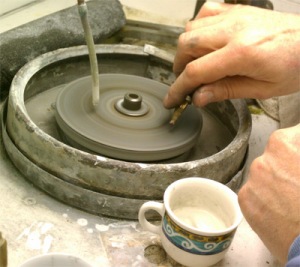
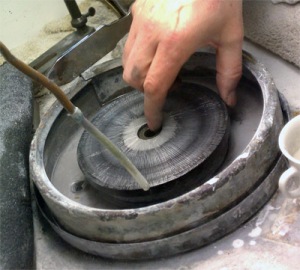
He’s changing out the wheel so he can start polishing each facet he put on the orange sapphires.
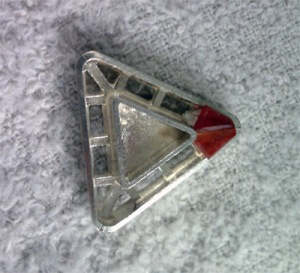
As you can see here that having a large stone on each corner would make it look so bulky so cutting the sapphires in half just made it look so much better.

My customer approved on how we were going to cut the sapphires for all three corners because frankly, it looked ten times better. After I got the okay, my father started the process of cutting the other 10 stones for each corner of the cufflink pairs.

After cutting the sizes needed for the corners, my pops polished the sapphires. The next step is where your setter comes into play. This is the part where you pray that you have a good setter that knows how to work and set colored stones so he doesn’t end up breaking the stones. This isn’t your ordinary channel setting so it’s vital your setter is a seasoned veteran when it comes difficult jobs like this.
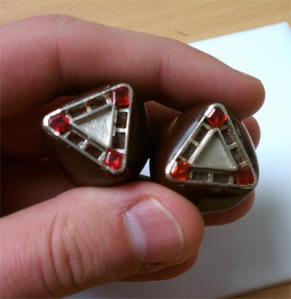
‘On the money’, so far, with the setting job. You start to get excited when your job is starting to come to life. The next process is cutting six pieces for each cufflink, so twelve total for the pair, of baguettes. tapered cut on one side only to sit flush with the corner sapphires. That should leave you with the middle section open where a straight baguette should sit, which is 6 total for the pair of cufflinks. This is the part where I fast forward the setting process and just show you the finished product.
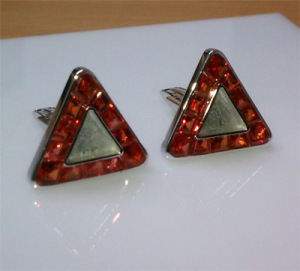
Amazing. ‘On the money’ job by my setter again. So for the final part of this special order, I supplied and cut some black mother of pearl for the middle bezel section but I did not glue it just yet. I had my jeweler polish and rhodium the cufflinks so that all I had to do was just glue the mother of pearl into the bezel. Fun fact of the day, rhodium ruins mother of pearl.
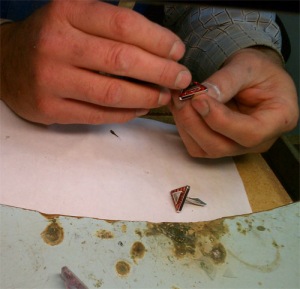
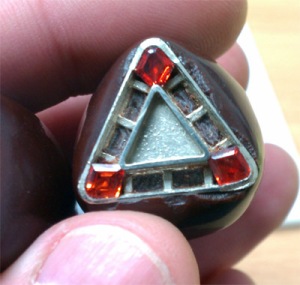
Here’s my dad gluing the black mother of pearl into the cufflink.

Beautiful. I mean, it’s not something that I would wear personally but the amount of time and effort and the years of experience and skill that takes to complete a special order job like this to perfection, isn’t always appreciated. My customer loved the cufflinks and that’s all that matters.
On that note, I want to wish you all a successful and happy 2013 and hell, the Mayans were wrong, the world didn’t end and I’m thankful for that. Till next time…
Emerald Aisle
July 30, 2012
On to my 31st blog post. I’ll just pat myself on the back for reaching this small milestone. My last blog post wasn’t up-to-par according to my father, the godfather of the gem cutting and inlay lapidary world. Touché dad, you were right. I blame writers block. Hopefully this post makes up for the last blog I put up. Let’s dive right into it then, shall we?
So I get this job where we had some non standard cut baguette emeralds that were sitting in a channel set setting on one side. On the other side of this ring, we had some baguette diamonds also sitting in a channel set. The ring had a large emerald cut diamond and a large emerald cut emerald acting as the two center stones for this old school accessory (probably dating back 50-70 years to my estimation). Before I continue, ‘non standard cut’ stones means that you wouldn’t find this style at your regular gem dealer. Standard cuts usually follow manufacturing guide lines based on increments of size change. I.E. 4x2mm, 5x3mm, 6x4mm, etc… That’s the easiest way to explain it for people not familiar with industry terminology. So for something like the size I need to cut down to, at 4.2×2.2mm, I’d need to find a stone close to that size. It’s always economical for me to find something that is as close as possible in size and weight. Every gem stone has some sort of market value set and and you multiply it towards the weight and you get the total worth of the stone itself.
With this particular job, the emeralds in the channel set were damaged from years of wear and tear, and the outside walls of the channel needed some laser soldering. Plus, to finish off the ring a nice high polish. You may be wondering where are all the pictures? (coming up below). I wasn’t planning on making a blog on a standard job like this but what unfolded, became a nightmare.
Before I hammered out all the emeralds to break them to start my process of cutting new emeralds for my setter to set into this ring, I took it to my jeweler to fill in the walls by laser soldering the area. While applying the gold solder onto the outside side wall, my guy calls me in to see what’s going on. We were all baffled with the current situation we were facing – the metal started to crack and flake.. I did a little research and it turned out this ring was nickel plated. So here’s my educated guess on what was done to this ring (I might be wrong but it makes perfect sense). The ring was originally 18karat white gold and whoever owned this ring decided to nickel plate the piece. Why would you do that? My guess is that when you nickel plate something, it produces a crazy shine that sterling silver gives off and it’s way cheaper versus plating something in gold and silver. Nickel plating consists of copper, nickel and zinc properties. Economically speaking, it sort of makes sense. My customer didn’t know it was nickel plated and nor did I. This is where I started to think this job was ‘blog’ worthy.

Notice the indentation on the wall? That’s where I’m supposed to fill it in with the laser solder process.

You can sort of tell some of the emeralds are damaged from the image but take my word on it, they were all either chipped, cracked or damaged in some sort of way. You can even see on top of the wall of the channel there is a bit of damage as well.

What we decided to do is rebuild the whole channel from scratch, lap off all the nickel plating, and build a new support system and new channel for the new emerald baguettes. If you take a look, the large emerald cut emerald center stone was removed to avoid damage that heat and any stress would cause the stone. Emeralds are very fragile and few brave setters dare take on such a task of setting these stones. They’re loaded with tons of natural inclusions you can visibly see and not see so you have to be careful setting them or they will break on you.


The walls are slightly higher then the rest of the ring because it gives the diamond setter more flexibility while setting and it would be eventually leveled out and made flush with the rest of the ring.

So we started to set the baguette emeralds into the channel. In situations like these, it’s always great to have your setter close by when working on jobs which require each stone to have a special measurement in order to accent the limited space you have to work with. The setter would tell me ‘trim the stone from this angle a little bit’ and we’d go from there.

I’ll let you marvel a little so I can stop rambling.


This monster of a ring turned out just fine. It’s like I restored an old car back to life with some modern touches. The customer was extremely happy with the results, after some unexpected hiccups on my end, but it was well worth the trouble. The owner of this ring should be proud sporting such a classic on their finger.
So this is where I want to plug myself via my Instagram page to expand my viewership . If you have instagram, look me up at ‘CJD_Sako‘ or click on this link here, http://followgram.me/cjd_sako/ which should take you to my profile. I’m not sure you can follow someone via a home computer but from what I read, followmegram.me allows you add a user without a phone. For my next blog, I’ll be doing a unique Instagram special on all the jewelry items I’ve posted on the site. Some of the filters really make my work look like something out of Vanity magazine. Anyway, if you have any questions, comments or concerns or even suggestions on what you’d like me to chat about, let me know, leave a comment on this blog or email me at sako@cicadajewelrydesign.com. I can help you out with all your needs.
Till next time…
Tapered French Cuts
February 28, 2012

This is my first attempt at posting a mini blog, if you can call it that, off of my WordPress application off my phone so bare with me. I’ll be doing a lot more to keep this blog active.
I supplied about 30 square step cut sapphires with extra just incase my diamond setter breaks some. I re-cut them into French cut tops and slightly tapered the sides of the stone so it can sit side by side with no gaps when my setter sets them around the eventual diamond that will sit in the bezel. These stones are all machine cut to the millimeter to improve accuracy.
Cheers for my first mobile blog post and many more to come.
