Turquoise Grooves
July 29, 2011
I’ve been slacking once again with my blog entries. I do apologize, but I have a good one in store for you today – Turquoise. If you come to my office, you’re bound to find turquoise rough just hanging around somewhere. I actually just stopped typing to take a peek into my workshop to catch a glimpse of a turquoise rough just hanging next to the window. So, before I describe my most recent endeavor, let me share some information about turquoise.
Turquoise is an opaque stone, which means it is not see-through. It has a hardness of just under 6 on the Mohs scale. Turquoise is found in or near copper deposits/mines as it depends on the presence of copper ions for it to form. It is composed of a hydrous hydrate of copper, aluminum and phosphorus elements. Turquoise was one of the first gem stones to be mined. It comes from all over the world (Afghanistan, Africa, Australia, Brazil, Chile, China, Egypt, Iran, Israel, Mexico, Siberia, Tibetan, Turkey and the US of A). The particular turquoise I am working on comes from a unique mine located in Arizona. The western state is home to some of the largest mines in the world including the ‘Sleeping Beauty’ mine where my stone originates. Sleeping Beauty turquoise is a solid stone with no matrix that ranges in color from Royal Blue to a very light Sky Blue. Generally speaking, turquoise color ranges from green to greenish-blue to blue.
And what better way to finish off this little digression on turquoise with these interesting facts! Did you know that no English gentleman of the 17th century was not regarded as well dressed or well adorned unless he wore jewelry of turquoise? This stone was so highly valued that all 79 of the emeralds in the crown that Napoleon gave his consort Marie Louise were replaced with Persian turquoise cabochons. In my opinion, I prefer sleeping beauty turquoise for its color, quality, and the nice value it carries. I personally think it’s better than the Persian stuff. Again, that is my opinion.
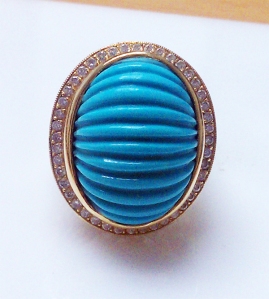
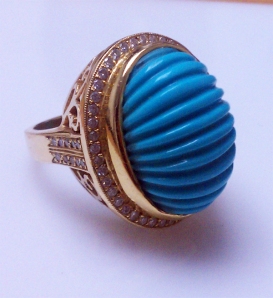
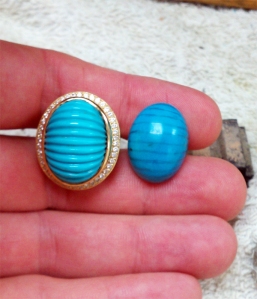
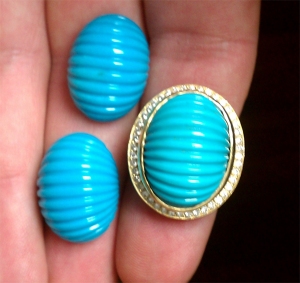
I made a special order ring about a year ago with diamonds around the mounting and I supplied it with a high cab sleeping beauty turquoise with grooves that I carved into it. I would of blogged about it but I didn’t have a blog at the time. But now I do!
My customer has asked me to cut 2 matching oval shaped sleeping beauty turquoise with the same carved grooves for some earrings that she wants to make.
Here’s the top view of the Carved Sleeping Beauty Turquoise I supplied and cut.
Here’s a side view. Notice the classy look on the ring, yet the Turquoise is still the center of attention.
So I go pull out some Sleeping Beauty Turquoise rough.
Here’s another angle. I’ll be slicing through this to get the deserved size I want before I preform the turquoise.
I quickly preformed the 2 pieces of turquoise I need with a flat bottom by hand after I sliced it from its rough form.
Here’s another angle. Notice how high the dome is. It gives me room to carve into the turquoise and give it its groove without sacrificing too much of the height of the stone.
I glued the turquoise onto the dopping stick as a guide so I can start going into detail with the desired size. I’m using a millimeter gauge to measure the 16x12mm size I need. If you don’t know what a dopping stick is, click this link ‘here‘, which should take you to one of my first blogs explaining the steps into the gem cutting world.
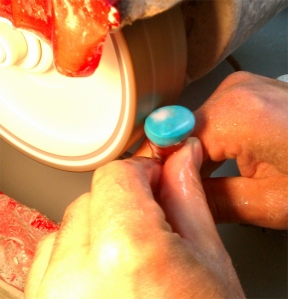
you have to apply the softest touches to the disk or it’ll eat away at your turquoise.
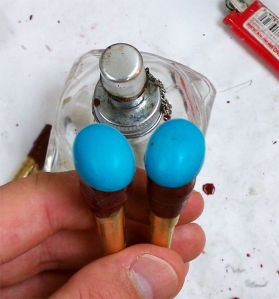
I ended up with 2 matching color, cut, and shaped beauties (no pun intended) after I used the preforming machine.
Here’s a side view of the matching turquoise cabochons on the dopping sticks.
I removed it off the wax/glue and I started to pencil in the areas where I’d be carving in the grooves.
Here’s a better look. What’d did you expect? A pencil is an awesome tool sometimes.
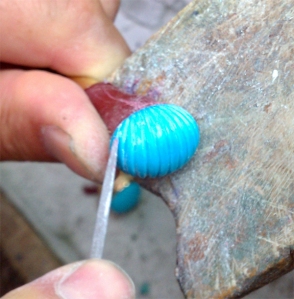
I just started filing in the grooves. Sorry, my bench light is ruining the picture but you get the idea.
I’m using my filer to cut into the turquoise. By doing it by hand, you have more freedom in your movement.
I’m working the edges on the turquoise here.
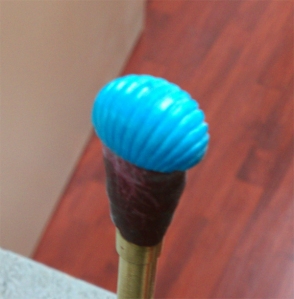
I finished using the hand file. It sort of looks like a preformed state after I filed it.
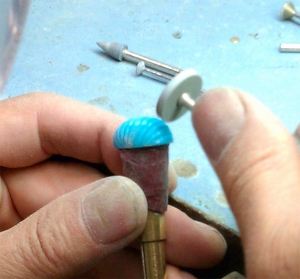
I started using a specially designed drill bit with a round disk with an inward curvature to round out the grooves.
I took it to my lapidary machine and gave it a little nice polish on top to get these 2 beauties.
Matching cut pairs.
That was a fun and challenging project. Next week I’ll start putting some of my special orders I get that involve some sort of gem cutting + whatever I make for the gemstone. Till next time…








Always learn something new from your blogs! thanks!
Anytime, I appreciate the fact you enjoy my blog! If you want, subscribe to my blog by scrolling to the bottom of the page and enter your email address. Thanks once again!
That is amazing! You do beautiful work.
Thanks Doug, I appreciate the love!
[…] matching pairs. I gave a detailed breakdown in my turquoise groove blog so click on the ‘link‘ and have yourself a […]
I love your blog! It encouraged me to keep learning and improving! Thank you so very much!!!
I’m glad you enjoyed it and I’m encouraging you to keep learning about the trade. If you have any questions, feel free to ask away! Subscribe to my blog if you want. I appreciate the kind words.